 how-to
How to Help Jumper's Knee: Recovery Steps
Table of Contents
- What Is Jumper's Knee (Patellar Tendinitis)?
- Common Symptoms and Causes of Jumper's Knee
- Immediate Relief: The R.I.C.E. Method and Pain Management
- Patellar Tendonitis Exercises for Strengthening
- How to Treat Patellar Tendonitis at Home
- Jumper's Knee Recovery Time and Return-to-Sport Protocol
- When to Seek Professional Care
- Frequently Asked Questions
Last Updated: September 25, 2026
What Is Jumper's Knee (Patellar Tendinitis)?
Jumper's knee, also called patellar tendinitis, is inflammation of the patellar tendon. This thick band of tissue connects your kneecap to your shinbone. The condition develops from repetitive stress on the tendon, typically from jumping, running, or activities that place heavy load on the knee joint. (Source: the National Institutes of Health (NIH))
The patellar tendon absorbs force every time you jump, land, or accelerate. Over time, repeated stress causes micro-tears in the connective tissue. Your body responds with inflammation and pain. The condition is common in basketball players, volleyball players, and distance runners, but anyone doing repetitive knee activities can develop it.
Early intervention prevents jumper's knee from becoming chronic and accelerates recovery.
Common Symptoms and Causes of Jumper's Knee
Pain at the base of your kneecap is the hallmark sign of jumper's knee. The pain typically worsens when you jump, land hard, or climb stairs. You might notice swelling just below the kneecap or feel stiffness after activity.
Common symptoms include:
- Sharp pain directly below the kneecap
- Swelling and warmth around the patellar tendon
- Stiffness that improves with gentle movement
- Pain that worsens with jumping or running
- Difficulty with explosive movements or rapid direction changes
What causes jumper's knee:
Repetitive stress causes small tears that don't heal properly when stress continues.
Immediate Relief: The R.I.C.E. Method and Pain Management
The R.I.C.E. method remains the gold standard for initial injury management. This approach reduces inflammation and pain in the first 48 to 72 hours after symptoms appear.
R.I.C.E. stands for:
- Rest: Stop activities that aggravate the knee. This doesn't mean complete immobility, gentle movement helps, but avoid jumping, running, and high-impact exercise.
- Ice: Apply ice for 15 to 20 minutes every 2 to 3 hours during the first few days. Cold therapy reduces swelling and numbs pain.
- Compression: Wrap the knee with an elastic bandage to limit swelling. Keep the wrap snug but not so tight it cuts off circulation.
- Elevation: Keep your knee above heart level when resting to reduce fluid buildup around the joint.
Patellar Tendonitis Exercises for Strengthening
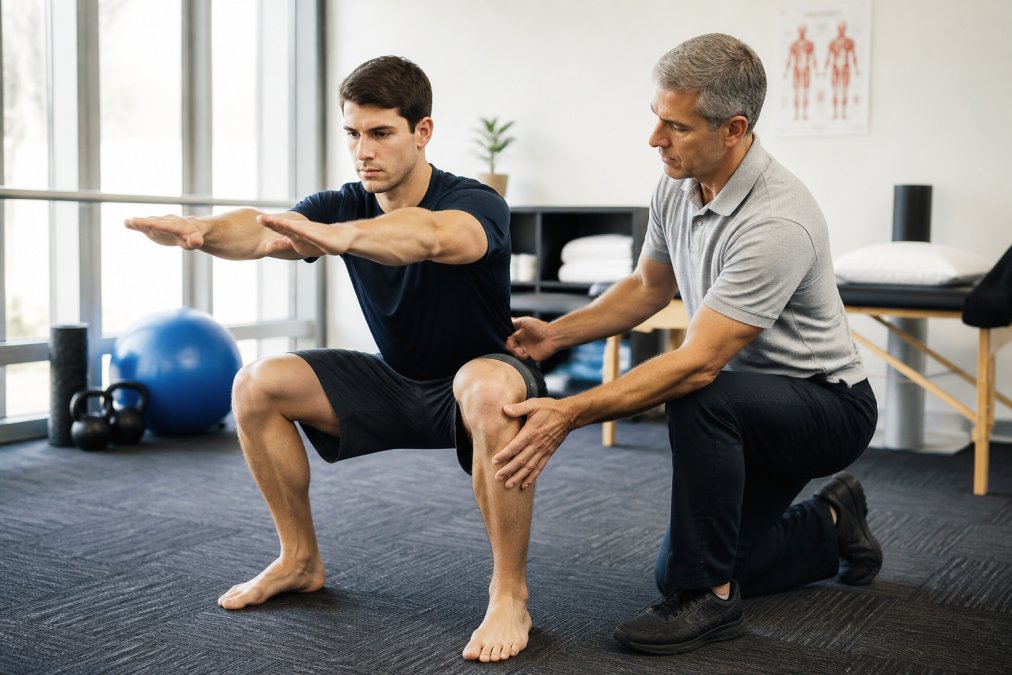
Strengthening the quadriceps is essential for jumper's knee recovery. A strong quadriceps stabilizes the knee joint and reduces stress on the patellar tendon. Eccentric loading, where the muscle lengthens under tension, is particularly effective for tendon healing.
Effective strengthening exercises:
-
Isometric quadriceps sets, Sit with your leg extended. Tighten the quadriceps muscle for 5 seconds, then relax. Repeat 10 times, three times daily. This builds strength without moving the knee joint.
-
Eccentric squats, Stand facing a wall. Slowly lower yourself into a squat over 3 to 5 seconds, then use both legs to stand back up. The downward phase (eccentric loading) is where the strength-building happens. Do 3 sets of 10 reps, three times per week.
-
Straight-leg raises, Lie on your back with one leg bent and one straight. Raise the straight leg 12 inches off the ground and hold for 2 seconds. Lower slowly. Do 3 sets of 15 reps per leg.
-
Step-ups, Step up onto a 6-inch platform, leading with the affected leg. Step down slowly and controlled. Do 3 sets of 12 reps.
-
Terminal knee extensions, Attach a resistance band to a fixed point at knee height. Stand facing away from the anchor point. Step forward so the band creates tension behind your knee. Straighten your leg fully against the resistance. Do 3 sets of 15 reps.
How to Treat Patellar Tendonitis at Home
Home treatment for jumper's knee recovery focuses on reducing inflammation, improving flexibility, and gradually returning to function. Most cases respond well to consistent home care over 6 to 12 weeks.
Daily home treatment routine:
Patellar Tendon Bracing and Taping:
Nutrition for Tendon Healing:
- Protein: Aim for 1.2 to 1.6 grams per pound of body weight daily. Protein provides amino acids needed to rebuild tendon collagen. Include lean meats, fish, eggs, Greek yogurt, and legumes at each meal.
- Vitamin C: Essential for collagen synthesis. Eat citrus fruits, berries, bell peppers, and leafy greens daily; aim for 75 to 90 milligrams daily.
- Collagen and gelatin: Consuming collagen peptides or gelatin may support tendon repair. Add collagen powder to smoothies or consume bone broth several times weekly.
- Omega-3 fatty acids: These reduce inflammation. Include fatty fish like salmon, sardines, or mackerel twice weekly, or take a fish oil supplement.
- Hydration: Dehydrated tendons are more prone to injury. Drink at least half your body weight in ounces of water daily.
Weight management:
Sleep and recovery:
Activity modification:
Jumper's Knee Recovery Time and Return-to-Sport Protocol
Recovery from jumper's knee varies based on severity and treatment consistency. Mild cases improve in 4 to 6 weeks, moderate cases in 8 to 12 weeks, and severe cases in 3 to 6 months.
Return-to-sport progression with objective criteria:
Phase 1 (Weeks 1-2): Pain-Free Movement Foundation
- Pain-free walking on flat surfaces for up to 30 minutes
- Gentle strengthening exercises (isometric holds, straight-leg raises) with zero pain
- No running, jumping, or impact activities
- Criterion to advance: Complete all strengthening exercises three times weekly with no pain flare-ups the following day
Phase 2 (Weeks 3-4): Low-Impact Conditioning
- Light jogging on soft surfaces for 10 to 15 minutes at conversational pace
- Continue Phase 1 strengthening exercises; add eccentric squats and step-ups
- Swimming or stationary cycling for 20 to 30 minutes on non-running days
- Pain during activity should not exceed 2 out of 10
- Criterion to advance: Complete three jogging sessions weekly with no increase in swelling or pain the day after
Phase 3 (Weeks 5-6): Controlled Running and Agility
- Increase jogging to 20 to 30 minutes at moderate intensity
- Add controlled directional changes and light agility drills at 50% effort
- Sport-specific movements at reduced intensity
- Pain should remain below 3 out of 10
- Criterion to advance: Perform agility drills twice weekly for two consecutive weeks with no pain increase
Phase 4 (Weeks 7-8): Sport-Specific Training at Reduced Intensity
- Begin sport-specific jumping technique work at 60% effort
- Practice sport movements in isolation before combining them
- Increase running to 30 to 40 minutes at varied intensities
- Plyometric exercises: double-leg box jumps from low heights (6 to 12 inches), progressing by 2 inches weekly
- Pain should not exceed 2 out of 10
- Criterion to advance: Complete two full sport-specific training sessions weekly with stable or decreasing pain
Phase 5 (Weeks 9+): Graduated Return to Competition
- Weeks 9-10: Participate in practice at 75% intensity; sit out competitive matches
- Weeks 11-12: Return to competition with reduced playing time (50% of normal minutes or duration)
- Weeks 13+: Gradual increase to full participation as tolerated
- Monitor pain and swelling daily; if pain exceeds 3 out of 10 during activity or swelling increases the following day, return to the previous phase for one week
- Criterion for full return: Complete full competition at normal intensity for two consecutive weeks with pain remaining below 2 out of 10 and no swelling increase
Red flags that signal you're progressing too fast:
- Pain that increases during a session or worsens the next day
- Swelling that does not resolve within 2 hours of icing
- Limping or altered movement patterns to avoid knee pain
- Pain that wakes you at night or prevents sleep
- Recurrence of sharp pain below the kneecap
When to Seek Professional Care
Home treatment works for many cases, but seek professional care if pain persists beyond 2 weeks despite R.I.C.E. and rest, if swelling increases significantly, if you have difficulty walking without limping, or if pain interferes with sleep. A sports medicine provider or physical therapist can evaluate your situation and design a targeted treatment plan. At Alternative Health & Healing Center, our team uses advanced therapeutic modalities to accelerate healing.
Frequently Asked Questions
How long does it take to recover from jumper's knee?
Recovery from patellar tendonitis typically ranges from 6 weeks to several months, depending on severity and how consistently you follow treatment protocols. Acute cases may improve within 4-6 weeks with proper rest and rehabilitation, while chronic cases can take 3-6 months or longer. The key is progressive loading: starting with rest and ice, moving to gentle strengthening exercises, and gradually returning to sport-specific activities. Compliance with home exercises and activity modification significantly affects recovery timeline.
What are the best patellar tendonitis exercises to do at home?
Effective home exercises include isometric quadriceps contractions, eccentric loading exercises (lowering slowly from a step), straight-leg raises, and controlled squats. Start with pain-free ranges of motion and progress gradually. Eccentric exercises are particularly valuable because they target tendon micro-tears and strengthen the patellar tendon under load. Perform exercises 2-3 times daily, holding each contraction for 5-10 seconds. Always warm up first with light activity, and stop if pain increases beyond a mild discomfort level.
Can jumper's knee improve without surgery?
Yes, most cases of jumper's knee respond well to conservative treatment without surgery. Physical therapy, load management, strengthening exercises, and activity modification resolve 80-90% of cases when applied consistently over weeks to months. Early intervention is crucial, addressing symptoms within the first few weeks significantly improves outcomes. Chronic cases that haven't responded to 6+ months of conservative care may require advanced therapies like shockwave treatment or other professional interventions, but surgery is rarely necessary as a first-line treatment.
Is walking okay for patellar tendonitis?
Walking is generally acceptable during patellar tendonitis recovery, but intensity and duration matter. In the acute phase, limit walking to pain-free distances and avoid steep inclines or stairs. Gradual, controlled walking on flat surfaces helps maintain mobility without excessive tendon loading. As recovery progresses, increase walking duration slowly. The key is activity modification: if walking causes sharp pain or significant swelling, reduce distance and speed. Pain should stay at a 2-3 out of 10 level during activity to avoid setbacks.